
Assess one of the secondary sources related to your local history project in the bibliography you created in Assignment
The Digital Past—Digital Local History
Final Assignments are required to be completed using this Word template – attached
- Download the template and save it as <LastName_FirstName_FinalAssignment>. This is the document you’ll submit in the #final-assignment channel on Slack.
In Module 4, you were introduced to the idea (really, the requirement) that your primary sources need to be understood within a broader historical context. It may be useful to think of context in three parts:
| Local contexts (Who, What, When, Where) describe the people, events, and time under investigation. When we consider local contexts, we answer questions about the specific places, social structures, and other circumstances that appear in our primary sources. Identifying these features is an important step toward connecting them to other local trends or events. | -Questions to Consider: What happened? Who was involved? Where and when did it happen? How does this relate to other events/figures? How do we know that something happened? How does this person, event, or idea relate to local institutional themes, such as: leadership/government/local politics, place/space/location, labor/industry/employment, health/hospitals/institutions, education/institutions, transportation/technology/mass media, settlement/housing/community planning? |
| Regional or national contexts (Why and How) offer insights into broader historical themes or patterns. As we explore regional or national contexts, we ask larger questions about the subject under investigation. These questions can draw connections between local events and relevant social trends or movements from that time period, helping you to answer questions about why or how something occurred. They can also help complicate common, dominant narratives of local events. | -Questions to consider: Why or how did something happen? How does your topic appear in other places – regions nearby to your focus, other places in the US, other places in the world? How different is your story from what happened in other places? Consider what these comparisons reveal information about why or how the topic you are investigating occurred. What other historical events or subjects are taking place during your period of study? Think about your research question in terms of broader historical periods, for instance: Colonial America; Reconstruction; the Gilded Age; the Great Depression; the Cold War; the Civil Rights Movements. Consider how your research topic fits within those broader events – how did those events affect and reflect your topic? |
| Subject or thematic contexts (What it means) connect people and events to broader areas of historical inquiry. Take the New York Shirtwaist Strike of 1909. We can evaluate it through the lens of women’s history as well as labor history. Both of these areas of study offer connections to other historical events, and frameworks for further analysis. | -Questions to consider: To which broad themes does your topic connect? For instance: industrialization, immigration, urbanization or colonization; the experiences and identity of a particular group (African Americans, Asian Americans, Hispanic and Latino Americans, Indigenous Peoples); Disability; Gender; Religion; Children and Family; Culture; Science and Technology, Military. Consider how your research topic fits within those broader themes — which issues and trends affect and reflect your topic? What types of language, concepts or frameworks do historians use to describe and discuss these themes? Which seem relevant to your research topic? How do these subjects or themes change from one time period to another? How does your topic fit with those changes? |
Each of these types of context should be combined with the others to make sense of the events and figures of the past. If we use only one form of context to study history, we fall short of answering important questions about the people and events we study.
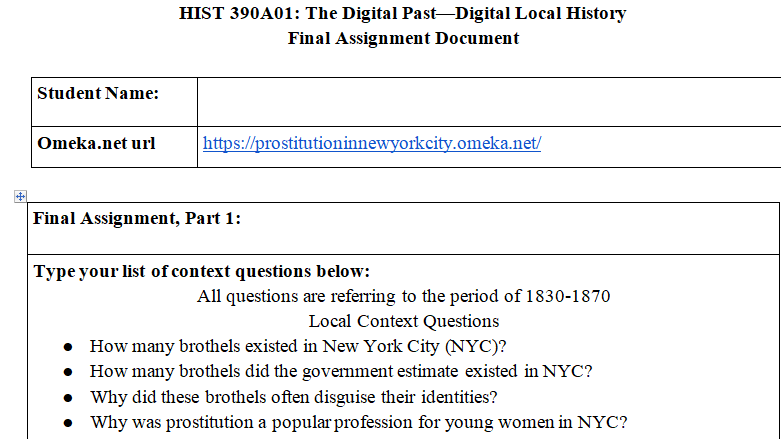
Final Assignment, Part 1: To which local, regional/national, and thematic contexts do your primary sources connect?
Using the questions to consider in the above table, create a list of questions related to your project for each level of context (local, regional/nation, subject/thematic). See the example list https://digitallocalhistory.org/wp-content/uploads/2020/06/Sample-Context-Questions.pdf of context questions to get an idea of the types of questions you should ask.
REMEMBER: Your list of questions should go in Part 1 of your Final Assignment Document.
Evaluating Secondary Sources
In Assignment 11, you identified secondary sources and entered their bibliographic information into Zotero. Now you must determine whether those sources are credible and useful.
Each secondary source should be evaluated according to the following criteria:
- What is the author’s narrative?
- What primary sources are used as evidence to support the author’s narrative?
- To what extent do the primary sources support the author’s account?
- Does the author consider other historians’ interpretations of what happened and why?
- How does the source compare to other secondary sources on this subject?
- How credible is the author?
Even after you’ve evaluated a secondary source, it may be useful to consider how other experts have responded to the work. There are a number of online networks of historians within a specific subject or region that can offer nuanced insight on secondary literature. Often, these communities create free online reviews of new texts while also discussing and evaluating established historical interpretation. See this resource list of online networks for historians https://digitallocalhistory.org/wp-content/uploads/2020/06/OnlineNetworksInHistory.pdf
Final Assignment, Part 2: How credible and useful are your secondary sources?
Assess one of the secondary sources related to your local history project in the bibliography you created in Assignment 11. That means you’ll need to read it (If you’re not familiar with reading a historical text for information, click here http://northwesthistory.blogspot.com/2010/04/how-to-read-book-in-one-hour.html
) Write an annotation for the source that does all of the following:
-Briefly summarizes the information that answers your context questions
-Assesses the text using the questions introduced in this section:
- What is the author’s narrative?
- What primary sources are used as evidence to support the author’s narrative?
- To what extent do the primary sources support the author’s account?
- Does the author consider other historians’ interpretations of what happened and why?
- How does the source compare to other secondary sources on this subject?
- How credible is the author? How have other historians reviewed or responded to this source (in order to answer this question, you’ll need to consult one of the networks in the linked resource list)?
REMEMBER: Your annotation should go in Part 2 of your Final Assignment Document.
Developing a Local History Narrative
READ: Sheila Brennan, Sharon Leon, et al. “Explorations” in Building Histories of the National Mall: A Guide to Creating a Digital Public History Project, 2015. http://mallhistory.org/Guide/content-development-and-interpretative-approach/explorations/
READ: Larry Borowsky, “Telling a Story in 100 Words: Effective Label Copy.” AASLH Technical Leaflet, 2007. https://gpmproject.files.wordpress.com/2012/09/6-borowsky-telling-a-story-in-100-words.pdf
The practice of history is, ultimately, the act of making a narrative about the past. People engaged in historical work bring together primary and secondary sources which illustrate and support their narratives. At this point, if you have worked through the previous modules, you have a collection of primary and secondary sources related to the research question you posed in the early modules. Using these sources, you will craft an answer to the research question, which you will present in digital form in an Omeka exhibit.
A narrative has a structure (it is organized) and it has a purpose (to communicate a point or points to an audience). It can also be made up of smaller parts (questions, evidence, and conclusions), that are linked together, each of which is connected to a larger overarching idea or question.
Before you can begin to craft your overall narrative answer, you should understand how the smaller parts – your primary and secondary sources – contribute to the narrative as a whole.
Think about what answers each source provides for your overall research question. For example, the Explorations on Histories of the National Mall first provide an overall answer to the question, and then use individual items and their contexts to answer specific pieces of the question. Using this framework as an example, consider whether any of your primary sources could be interpreted as answering the question in different ways, even if those differences are more about approach than outcome.
This analysis can be completed in a variety of ways: in a list, a mind map, a running text document (like in OneNote), or in a spreadsheet. In this module, we will use a table. The table below includes the steps for assessing a source’s relationship to the research question and the narrative:
| Compare | Bring together your primary and secondary sources Look for gaps in evidence and identify contradictions or similarities. |
| Synthesize | What conclusions can you draw from the evidence? |
| Interpret | What does the evidence suggest is the answer to your question? How does this contribute to the narrative? |
Final Assignment, Part 3: How will you answer your question?
Begin crafting an answer to your question. For each part of the answer, explain the sources for that information, both primary and secondary. You should return to the work you’ve done so far to help you create the connections between your sources. Here is an example https://digitallocalhistory.org/wp-content/uploads/2020/06/ComparisonSynthesisInterpretation.pdf of what this work looks like in finished form.
| Compare | Bring together your primary and secondary sources to compare to another *this practice is known as corroboration Look for gaps in evidence and identify contradictions or similarities. Look further, confirm the credibility of the source What additional information might you need? |
| Synthesize | What conclusions can you draw from the evidence you’ve found? |
| Interpret | Return to your research question–What does the evidence suggest is the answer to your question? How does this contribute to the narrative? *NOTE: The work of interpretation means more than just summarizing evidence. You should be combining the evidence to craft a narrative that answers questions about meaning (like why and how, rather than who, when, and where). |
REMEMBER: Your answer should go in the corresponding sections of the table in Part 3 of your Final Assignment Document.
Planning and Building an Exhibit in Omeka.net
Building an Omeka exhibit, like curating a museum exhibit or writing an essay, requires thoughtful planning. Unlike a collection, which brings items together as independent units, an exhibit involves placing those items into a particular order and putting them into conversation with other primary and secondary sources.
REVIEW: Miriam Posner and Megan R. Brett, “Creating an Omeka Exhibit,” Programming Historian. https://programminghistorian.org/en/lessons/creating-an-omeka-exhibit
An Omeka exhibit is a presentation of your items, with customized layouts and added text. An exhibit can have multiple pages, and you can make a page into a subsection of another page. With this amount of flexibility, there are a number of different ways to organize and display items and other content in your site. For instance:
The NAACP in Texas https://mansfieldcrisis.omeka.net/exhibits/show/naacp-texas exhibit, part of the Crisis at Mansfield project, combines secondary and primary source materials on exhibit pages and utilizes different types of page layouts to display and discuss items in the collection.
The Athletics and Physical Education at Bryn Mawr College, 1885-1929 exhibit http://greenfield.brynmawr.edu/exhibits/show/athletics-and-phys-ed/the-context/fears created by the Albert M. Greenfield Digital Center for the History of Women’s Education http://greenfield.brynmawr.edu/
offers a narrative about the importance of education (physical and mental) for women. Note how the exhibit pages combine broad national and regional contexts with the policies and practices at Bryn Mawr College.
Histories of the National Mall uses exhibits to create Explorations http://mallhistory.org/explorations, question-based examinations of historical features of the National Mall. These single-page exhibits combine items (primary sources) with secondary sources and interpretation to answer questions.
In each of these examples, the creators of the project have considered the best way to present the collections to create a narrative. Take time to think through the ways in which you might present your narrative online. The form that this take will depend on your question, your narrative answer, and the audience – the people who you hope and expect to read it (these may be two different groups).
The process of planning and building an exhibit can be intimidating for many reasons. However, breaking the project into several steps will help to make the work more manageable. The workflow for this project is visualized below (click on the image to see a larger version): <insert image; create page for larger image>
You have already gathered materials for the exhibit: a collection of items and some ideas from secondary literature. And in part 3 of the Final Assignment, you developed a narrative for the Exhibit that draws on both primary and secondary sources. Next, it is important to think about how to present that information in a meaningful way.
Here are some questions to think through as you draft the plan of your exhibit:
- Consider your audience
- Is your audience composed of experts on your subject or will visitors need you to provide background information and definitions of terms?
- How do you want visitors to use your site?
- Take time to map out some of the visitors you expect, and think about how they might each use the site differently.
- Organize primary and secondary sources into groups
- Which pieces of evidence relate to which portions of your narrative?
- How might these pieces be introduced to visitors to support your narrative?
- Which pieces of evidence belong together?
- Map out each page
- Where should visitors start in your exhibit?
- How should visitors move through your exhibit?
- In what order should your sources be introduced?
- Draw out an outline of your site, known as a wireframe. Think about how you want visitors to move between pages and items.
Final Assignment, Part 4: What would your perfect Omeka.net exhibit look like?
https://puertoricansinnewyork.omeka.net Site
In this part of the Final Assignment, you will familiarize yourself with the process of creating an exhibit in Omeka using the items that you have described and uploaded, and the information available in secondary sources. Remember that you are developing a plan–as noted at the beginning of the module, it is highly unlikely that your site will be complete at this point. Follow this tutorial, refer to the documentation for Exhibit Builder at Omeka.net, https://info.omeka.net/build-a-website/manage-plugins/exhibit-builder/ and review the reading by Brett and Posner from Programming Historian.
A tip before you begin: read through the entire tutorial and be sure to click save as you make changes and navigate between pages.
- Create a plan for your exhibit
- Using the questions above as a guide, create a plan for your exhibit. This can be a written outline, a sketch, a wireframe, or whatever format makes sense to you.
- Create an Exhibit
- An exhibit combines your primary and secondary sources through a series of pages.
- Add an exhibit to your Omeka site.
- Add a Page to your Exhibit
- Each page is made up of one or more customizable blocks of content. As we described in Module 5.1, narratives can be made up of several sub-sections. It may be useful to frame the pages of your exhibit around these narratives and their components.
- Add Blocks to your Exhibit Page (at least one of each type)
- Consider how you may use the blocks within a page to tease out the connections between primary and secondary sources, and how pages can be used to make specific points which contribute to the overall narrative of your exhibit.
- Be sure to experiment with different types of layouts and avoid creating pages of long text. Readers online prefer short text blocks enriched with visualizations.
- Even if you intend to use one or two block types for most of your exhibit, try out all possible block types to get a feel for what is possible.
- Add additional pages to discuss other aspects of your narrative using items and context briefs.
Write out the plan for your ideal exhibit detailing which components of your narrative and which primary and secondary sources appear on each page.
REMEMBER: Your exhibit plan should go in Part 4 of your Final Assignment Document.
Subject: History
You might need passwords to access the site,
username is omekasite
password is Puertorico
Answer preview………………….
 apa 2878 words